Fujifilm X100VI Menu Map: Where to Find Your Settings
An illustrated map of the X100VI menus: find film recipes, custom banks, focus, Auto ISO, the ND filter, flash and USB connections.
 Receptree
Applies to: Fujifilm X100VI in still-photo mode. Menu names and available options can vary with firmware and shooting mode.
Start with the job you want the camera to do
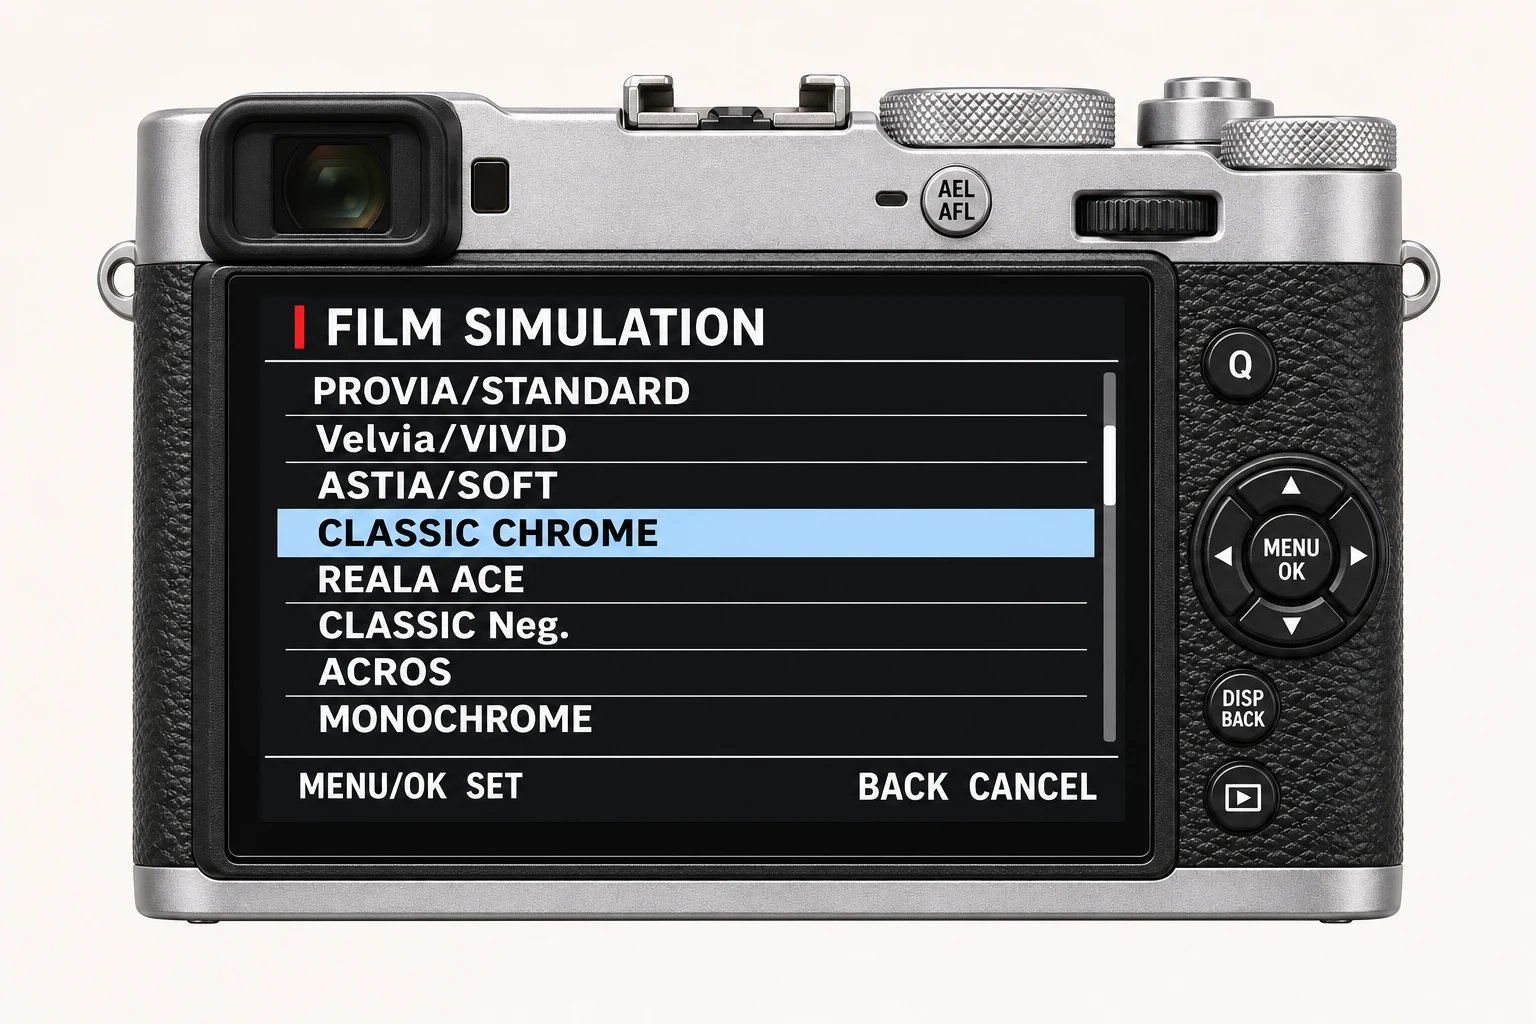
Find the category below, then scroll to the named item and press MENU/OK or move the focus stick right to open it. Move left to return to the category column; DISP/BACK takes you back. A highlighted row in these pictures is simply the row selected when the photograph was taken. Read the setting name rather than copying every displayed value.
| I want to… | Open this category | Look for |
|---|---|---|
| Change the JPEG look | IMAGE QUALITY SETTING (I.Q.) | FILM SIMULATION, WHITE BALANCE, TONE CURVE |
| Save or recall a recipe | IMAGE QUALITY SETTING (I.Q.) | EDIT/SAVE CUSTOM SETTING, SELECT CUSTOM SETTING |
| Choose the focus area or detected subject | AF/MF SETTING | AF MODE, FACE/EYE DETECTION SETTING |
| Control exposure and capture | SHOOTING SETTING | ISO AUTO SETTING, SHUTTER TYPE, ND FILTER |
| Configure flash | FLASH SETTING | FLASH FUNCTION SETTING, BUILT-IN FLASH |
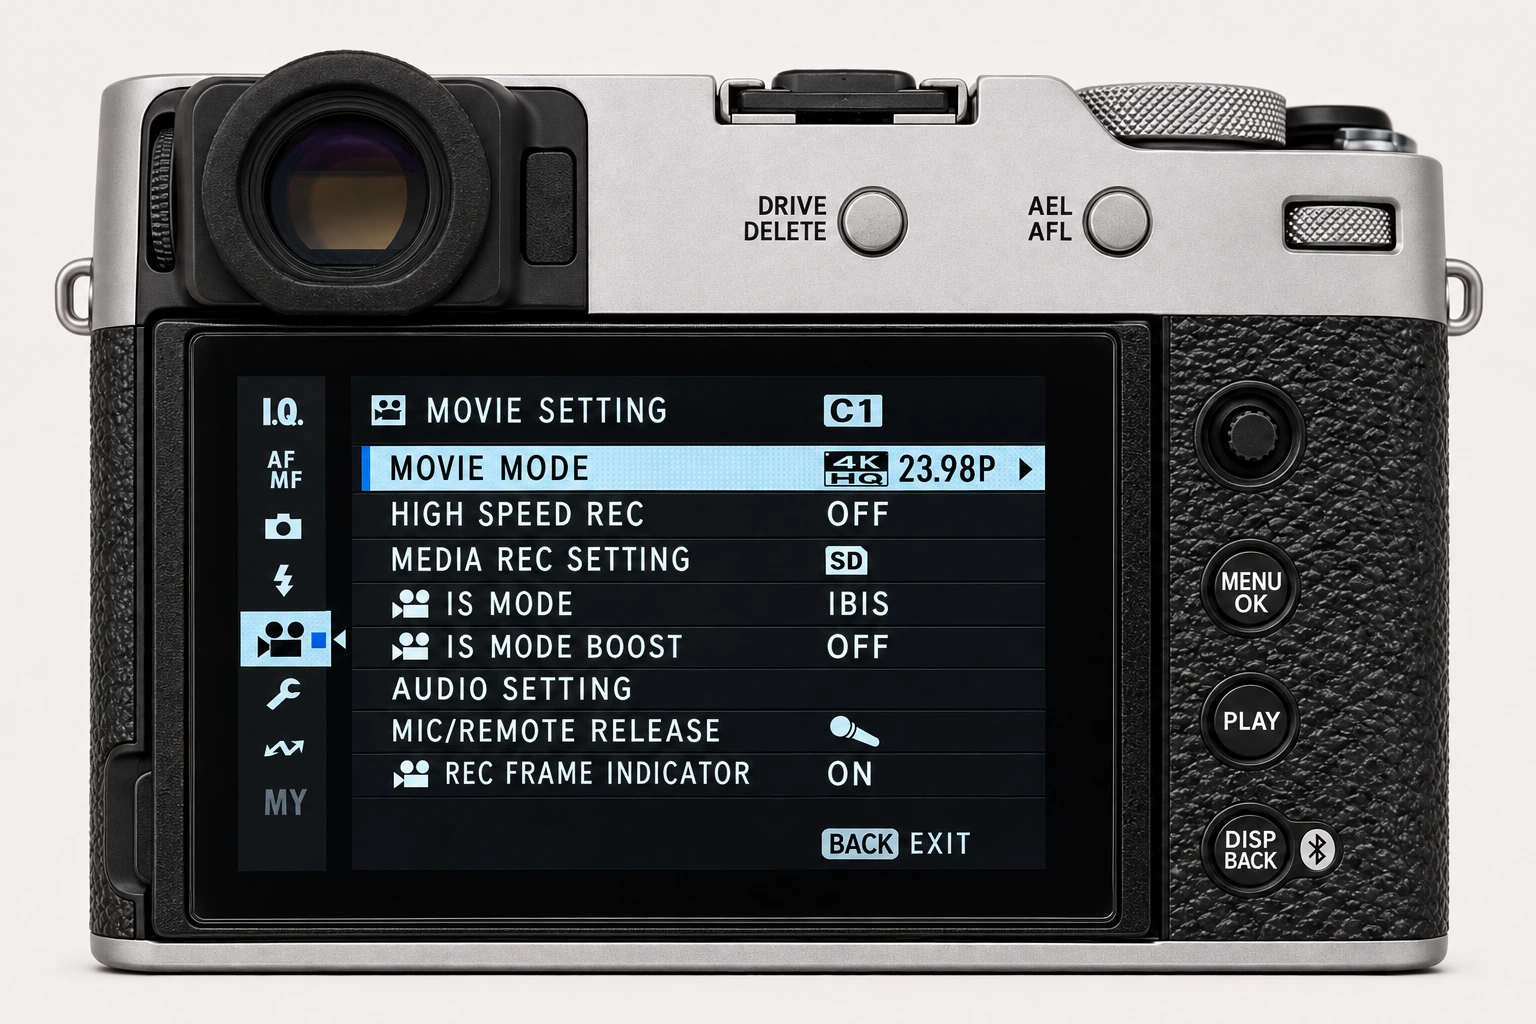
| Configure a quick movie recording | MOVIE SETTING | MOVIE MODE, AUDIO SETTING |
| Pair a phone or connect a computer | NETWORK/USB SETTING | Bluetooth/SMARTPHONE SETTING, CONNECTION MODE |
Image quality · page 1 of 3
Choose the file format and base JPEG look. Film Simulation, Grain Effect and Color Chrome Effect live here.
I.Q. page 2/3: colour, balance and tone
This page contains Color Chrome FX Blue, Smooth Skin Effect, White Balance, Dynamic Range, D Range Priority, Tone Curve, Color and Sharpness. The English illustration uses neutral example values. Open the individual Guides explanations for practical choices and interactions.
- Highlight and Shadow recipe values are inside TONE CURVE on this model.
- WHITE BALANCE opens the mode selection and its separate fine adjustment.
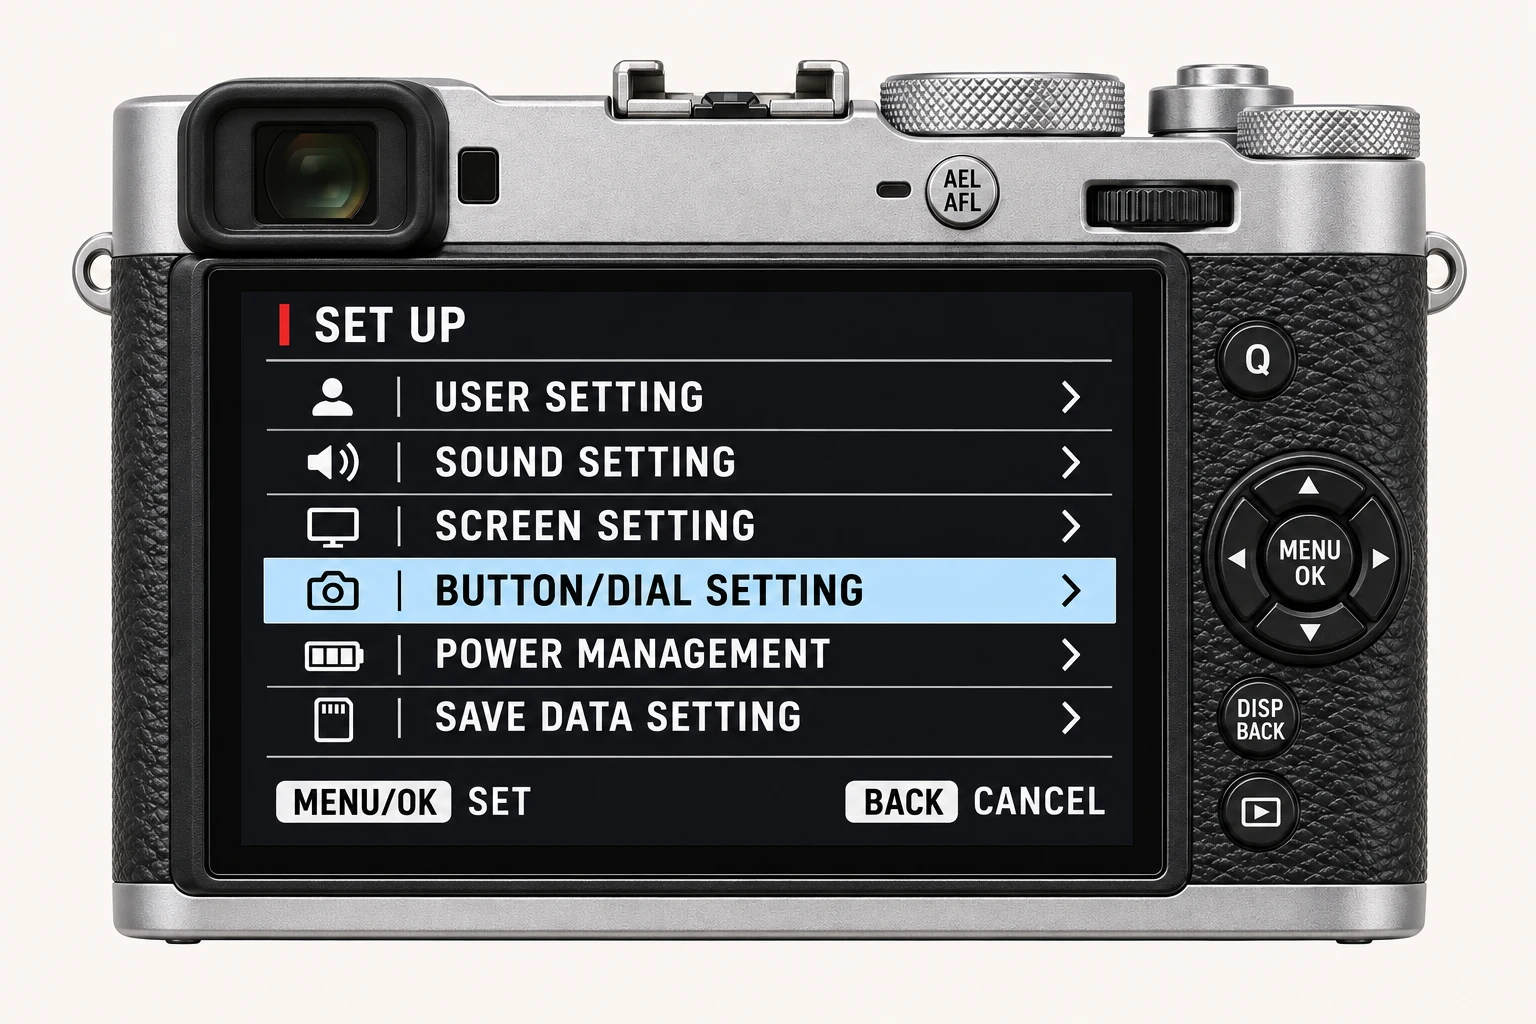
- The wrench-shaped SET UP tab and its submenus are also outside this photo set.
Image quality · page 3 of 3
Find High ISO NR and Clarity, then select or edit a custom recipe bank. Check Auto Update Custom Setting before changing a saved look.
Autofocus · page 1 of 3
Find Focus Area and AF Mode before adjusting tracking behaviour. The side S/C/M switch chooses the focus mode; this page chooses the AF area pattern.
Detection and manual focus · page 2 of 3
Find Face/Eye Detection, Subject Detection and MF Assist. Use this page to decide which subject focus should prioritise.
Focus checks and touch · page 3 of 3
Find Focus Check, Release/Focus Priority and Touch Screen Mode when magnification, shutter-release behaviour or touch input needs attention.
Timers and intervals · page 1 of 3
Find Self-Timer and Interval Timer Shooting before a tripod sequence or a photograph you want to appear in.
Bracketing, shutter and stabilisation · page 2 of 3
Find bracketing, Photometry, Shutter Type and still-photo IS Mode. Review these capture decisions alongside your recipe.
Auto ISO and the ND filter · page 3 of 3
Find ISO Auto Setting, Conversion Lens, Digital Tele-Conv. and the built-in ND Filter. AUTO3 is the photographed bank, not a prescribed setup.
Built-in and external flash
Open Flash Function Setting and check Built-In Flash. Greyed entries depend on the connected flash and current shooting conditions.
Movie shortcuts from still-photo mode
This is the compact Movie Setting page opened from the still-photo shooting display. Movie mode has additional menus.
Connections · page 1 of 2
Find Bluetooth/Smartphone Setting, Connection Mode and USB Power Supply/Comm Setting. Choose the connection for your intended task.
Connection reset · page 2 of 2
This page contains Reset Network/USB Setting. Review pairing and connection choices before deciding to reset them.
Image Quality · file combinations
Choose a rendered file, RAW, or both. Fine+RAW is an illustrated example, not a required setting.
RAW Recording · compression choices
Compare Uncompressed, Lossless Compressed and Compressed RAF recording. The selection is an example.
Tone Curve · Highlights and Shadows
Simplified illustration of the two Tone Curve controls at neutral example values. The diagonal explains the neutral reference, not a measured camera response.
Use this map alongside the manual
Use the menu photographs to locate each control on the X100VI. A disabled row may become available after changing focus mode, drive mode, file format or connected equipment. If your menu differs, search by the setting name in the official manual and check the firmware information for your camera.
Four recipes to try next
Choose a community recipe, check it against your camera and take it into the field.